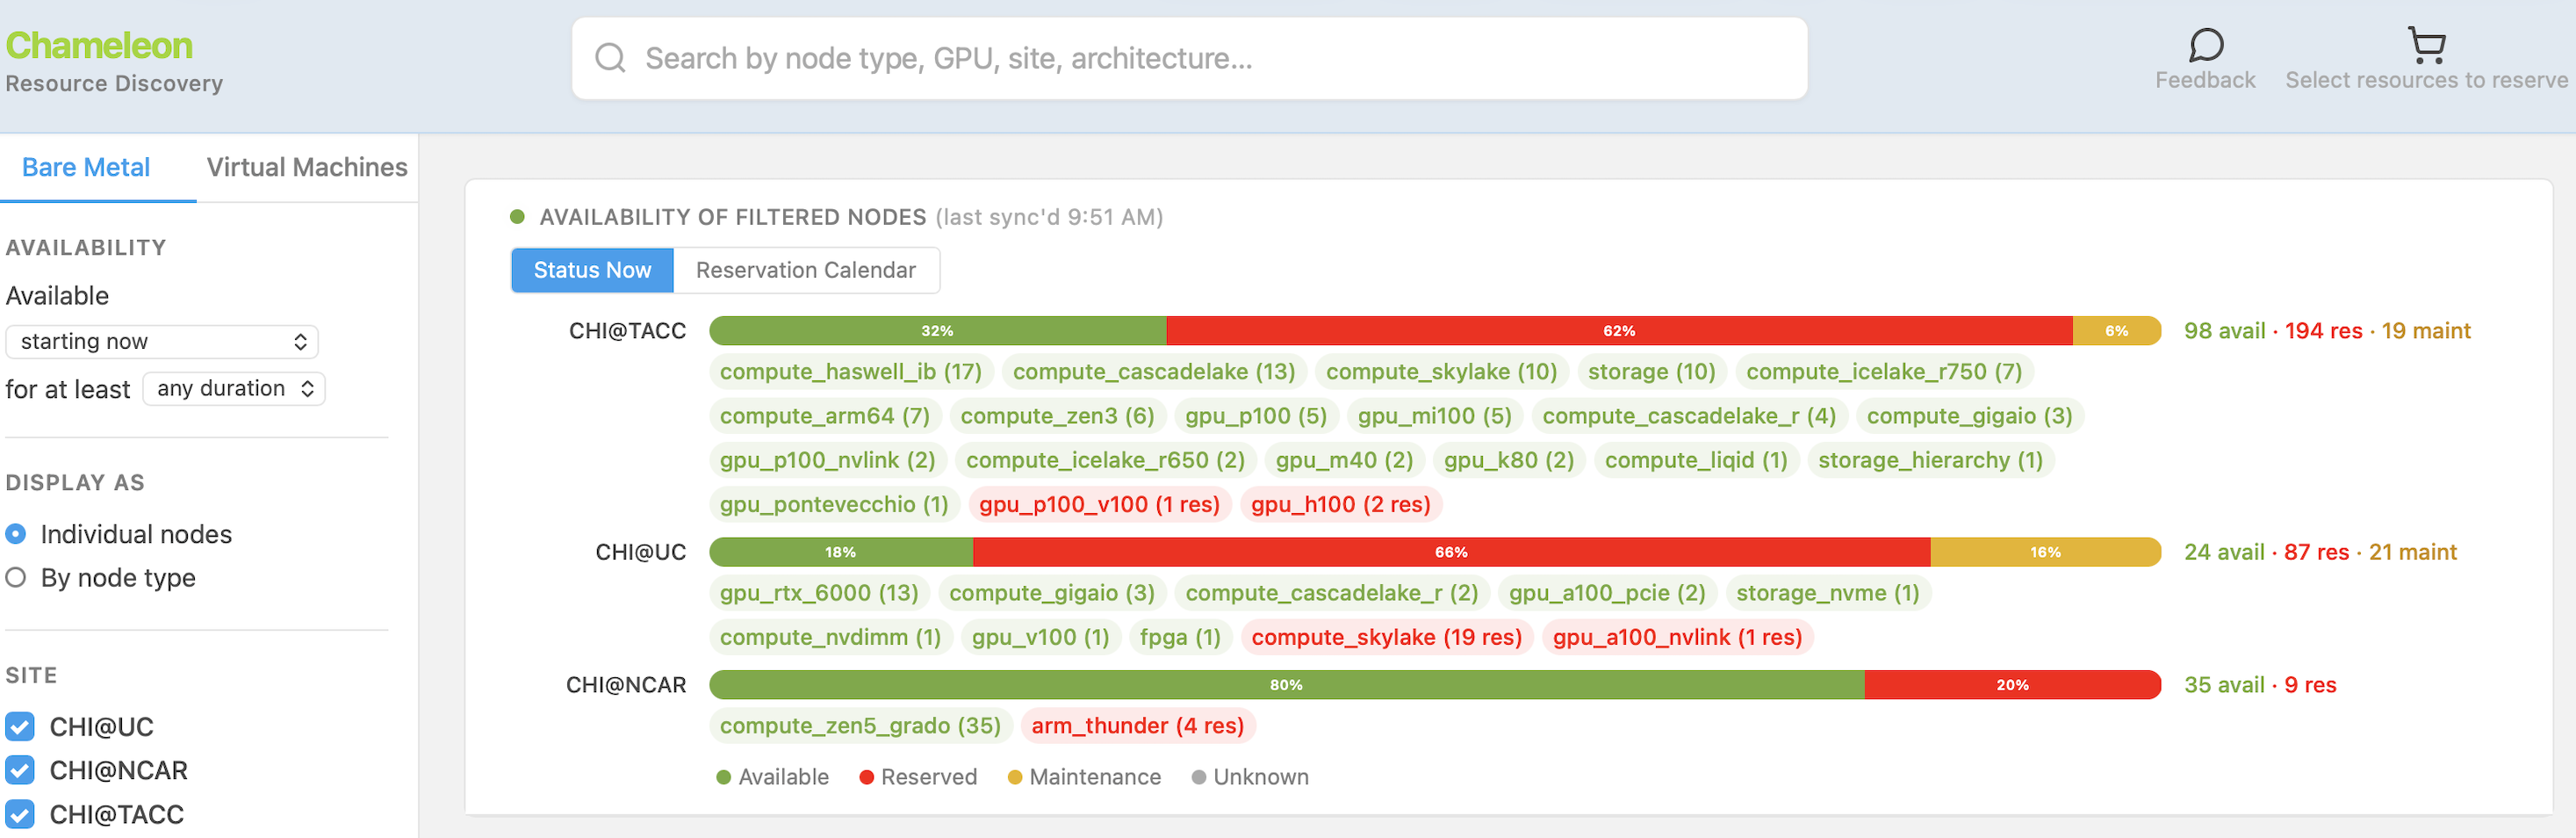
Finding the right resources is the first step of every experiment. If you work on machine learning, that probably means a particular GPU, or a particular amount of GPU memory. Confidential computing work means a CPU with SGX. Distributed systems and networking work means several identical nodes with a fast interconnect between them. Other experiments come down to one number: enough RAM to hold the whole dataset, or enough cores to run every trial in parallel.
Pinning that down is not always easy. Say you need sixteen homogeneous nodes for a distributed run, or a single node with as much memory as you can get, or an A100 rather than any GPU that happens to be idle. There's also the question of whether you want bare metal at all: bare metal gives you the kernel, the network stack, and hardware measurements with no virtualization in the way, while a VM boots in seconds, can run on a six-month lease if it doesn't need a GPU, and is usually the better home for the small supporting pieces of an experiment (more on that tradeoff here). And then there's availability, which can quietly decide everything else. You may want an A100 but be perfectly happy with an RTX 6000 if it means starting today instead of in three weeks.
We've redesigned Resource Discovery around those questions. Bare metal node descriptions and virtual machine flavors now live in one searchable place, you can filter for what's free during the window you care about, and you can see upcoming reservations across every site. VM flavors and availability information weren't in the old browser at all, so planning an experiment that needs both no longer takes multiple workflows.
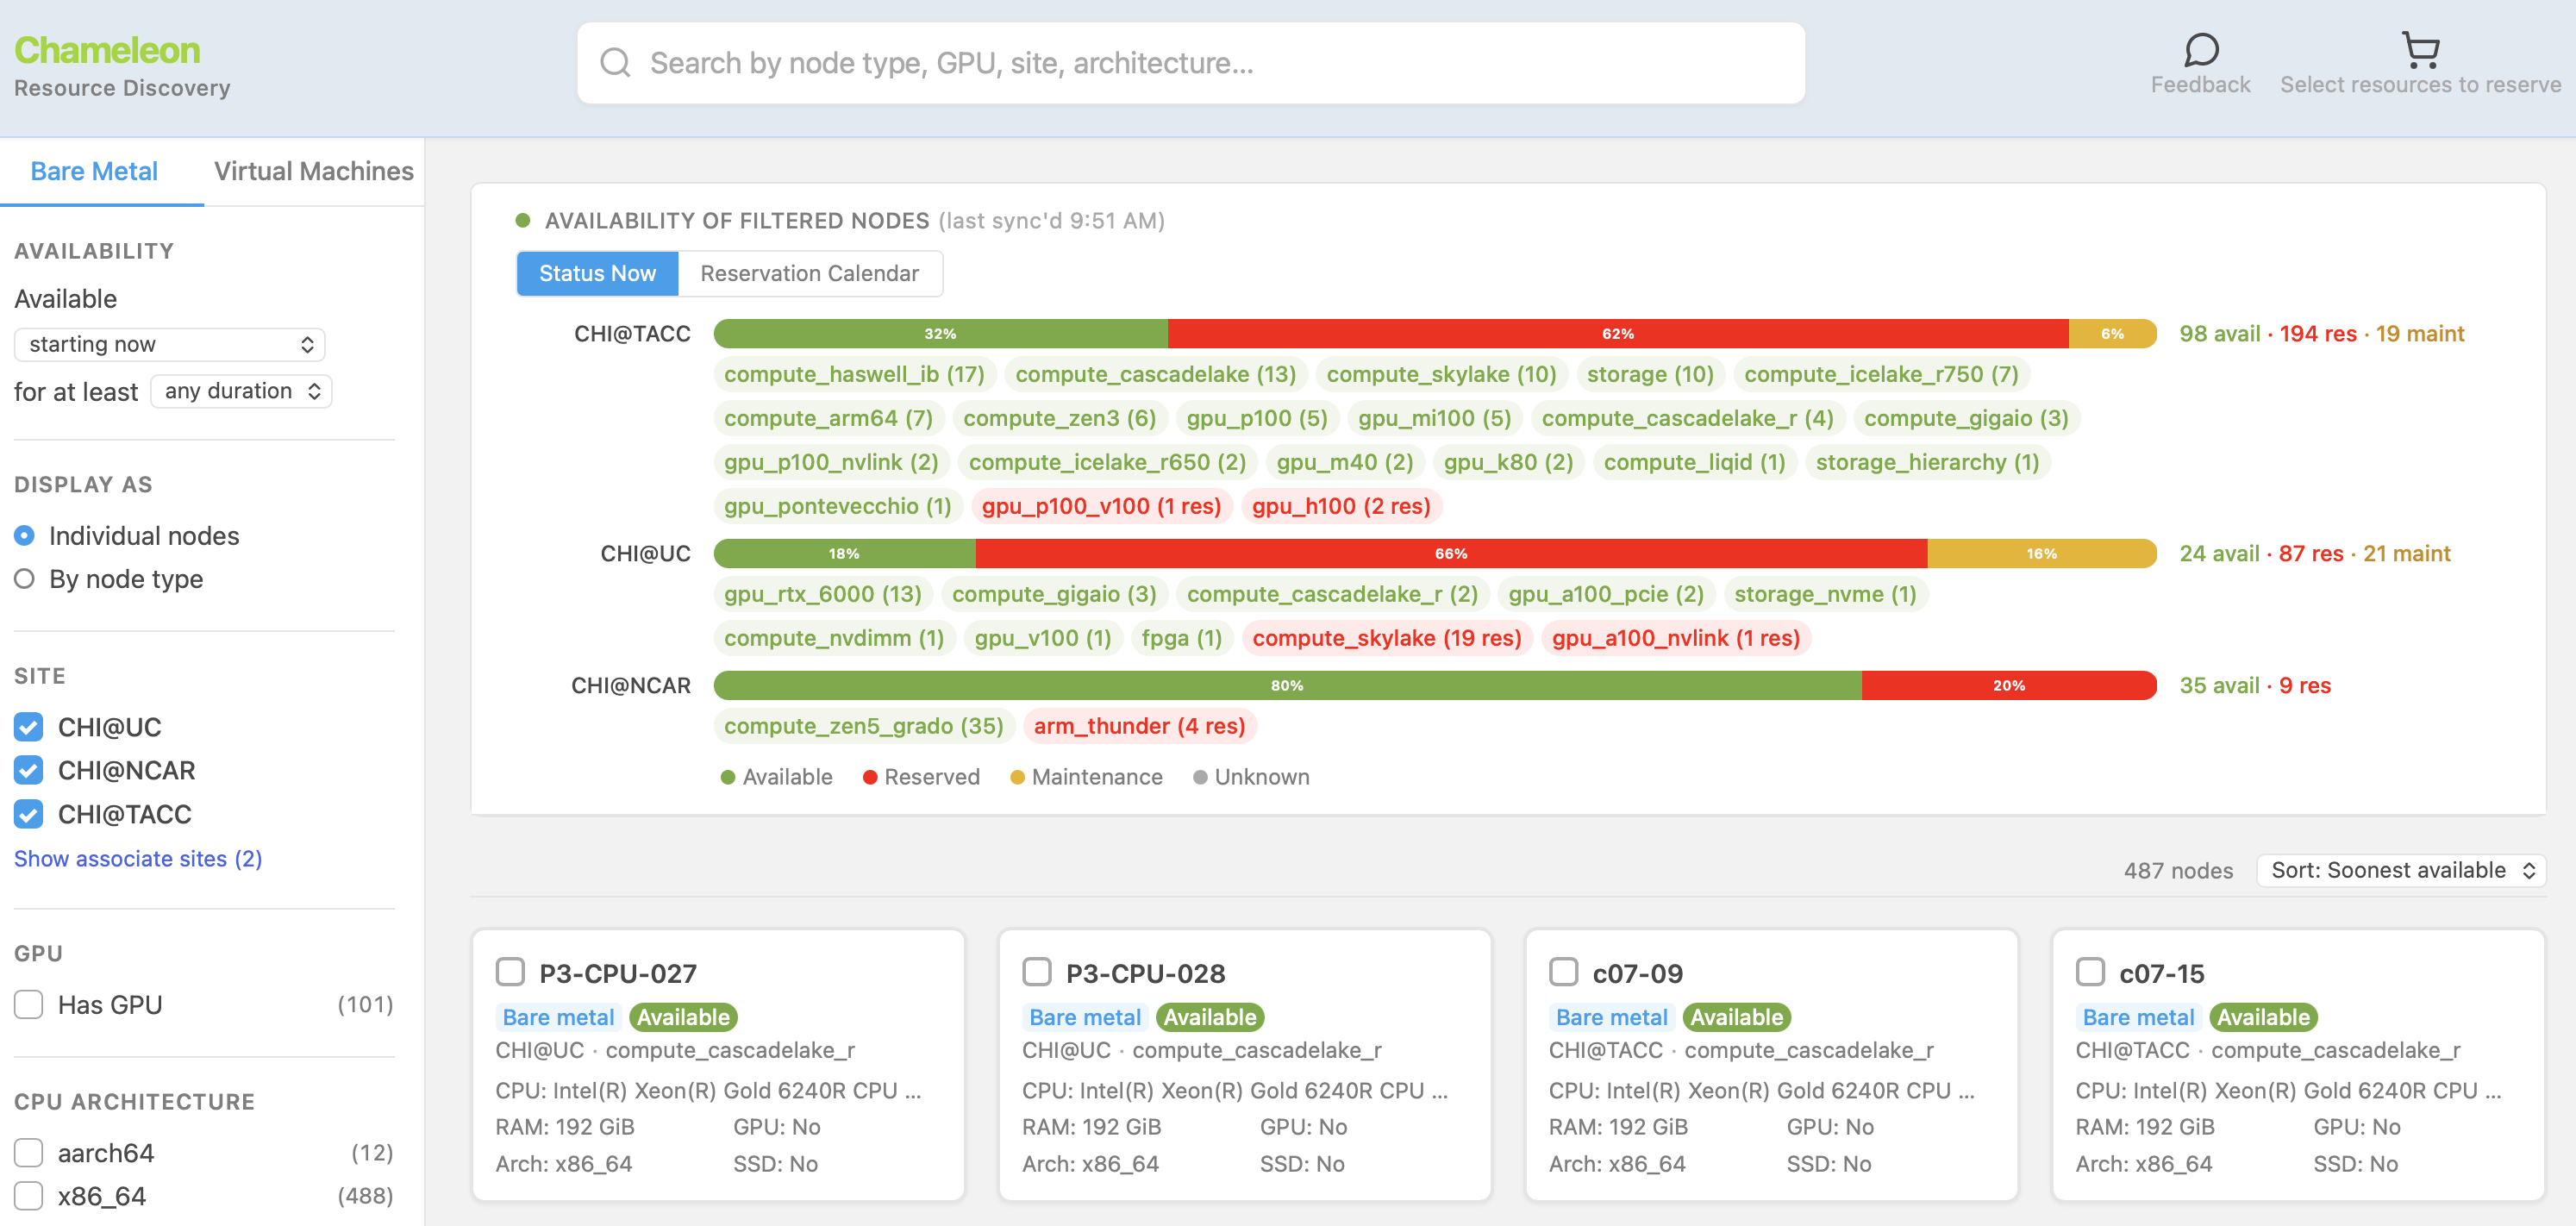
The redesigned Resource Discovery interface, with bare metal and VM tabs, filters, and search in one place.
Resource Discovery is where you plan an experiment: work out what resources it needs and when those resources are free. Once you know, you reserve it the same ways you always have, whether that's the Horizon dashboard, the OpenStack CLI, or python-chi.
Highlights
- A new interface, as you've probably noticed. Cards, filters, and search in place of the old hardware browser's buttons and grid layout.
- Virtual machine flavors. A dedicated tab (click on Virtual Machines in the left panel) showing vCPUs, RAM, and disk on every flavor card, including GPU flavors in MIG slice (
vgpu) and PCIe passthrough (pci) variants, plus a chart of how much capacity of that flavor is free over the next day, week, or month. - Availability everywhere. Filter for resources free starting at a time you choose, for at least the duration you need, and see what's reserved ahead from a whole site down to a single node. More on this below.
A few other small details worth knowing. Search covers node type, GPU model, site, and architecture (and more!) across bare metal and VMs at once, so searching from the Bare Metal tab gets you a link to matching VM flavors (and vice versa). A cart collects anything you check, bare metal and VMs together, and groups it by site at checkout. The page toggles between individual nodes and node types. Node detail pages still carry full specs, UUID, and admin notes.
Planning Around Availability
The panel at the top shows every selected site broken down into available, reserved, and under maintenance, with real counts and clickable node type tags. Switch it to Reservation Calendar for what's booked ahead, by month, week, or day.
The calendar follows the page's display toggle. Individual nodes gives each node its own row of bars, so you can see which nodes of a type are the busy ones. By node type collapses to one block per type, where overlapping bars show where the gaps are.
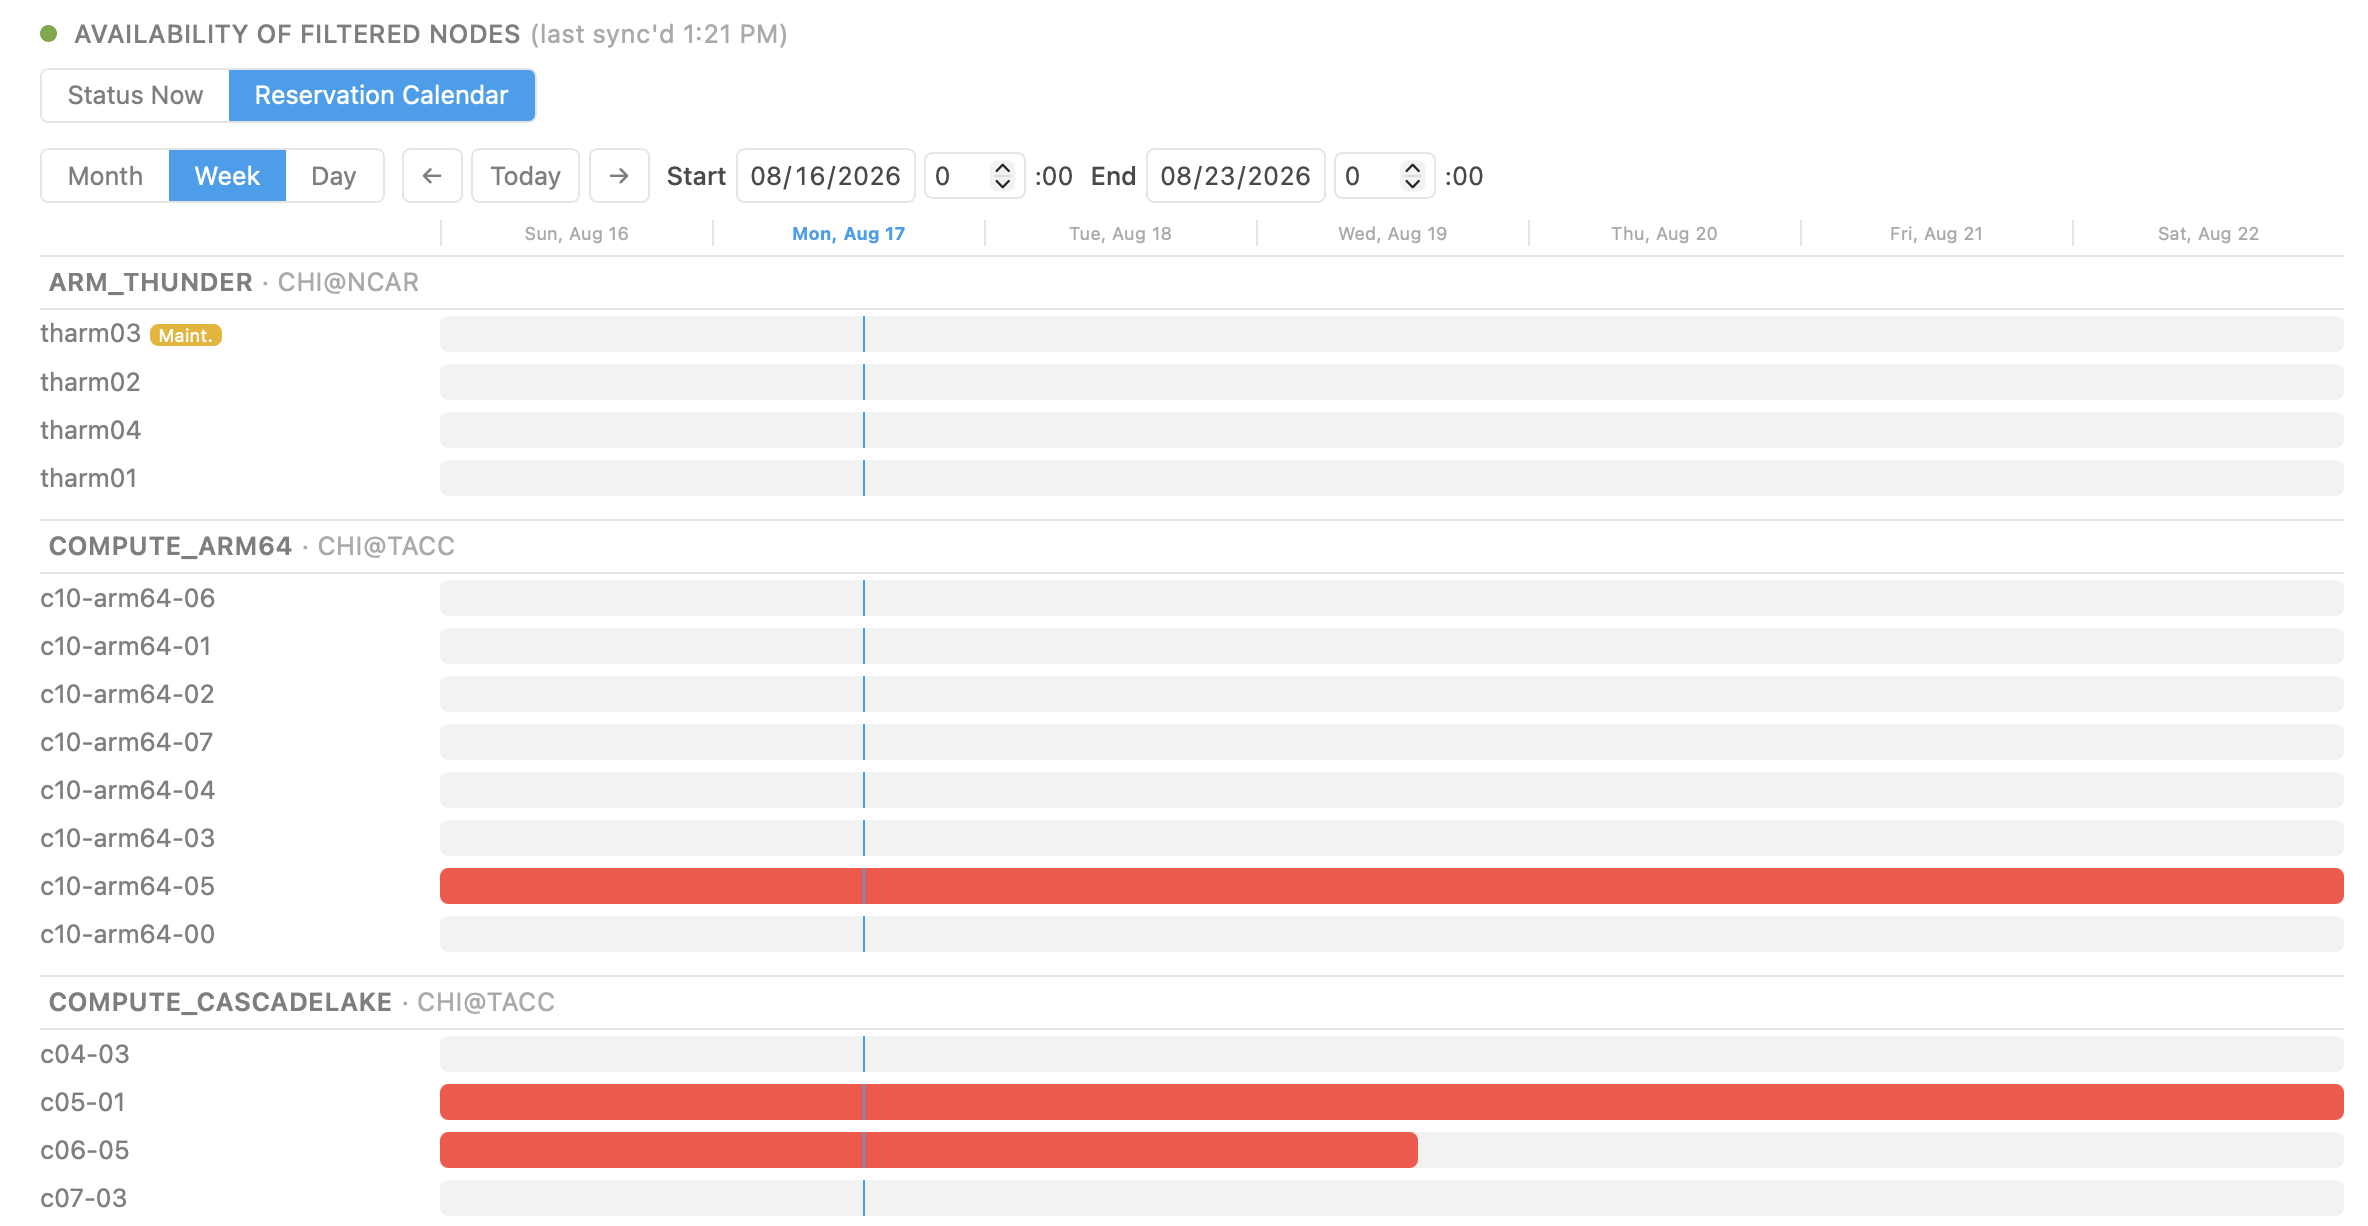
The Reservation Calendar in individual node view, with each node shown as its own row of reservation bars.
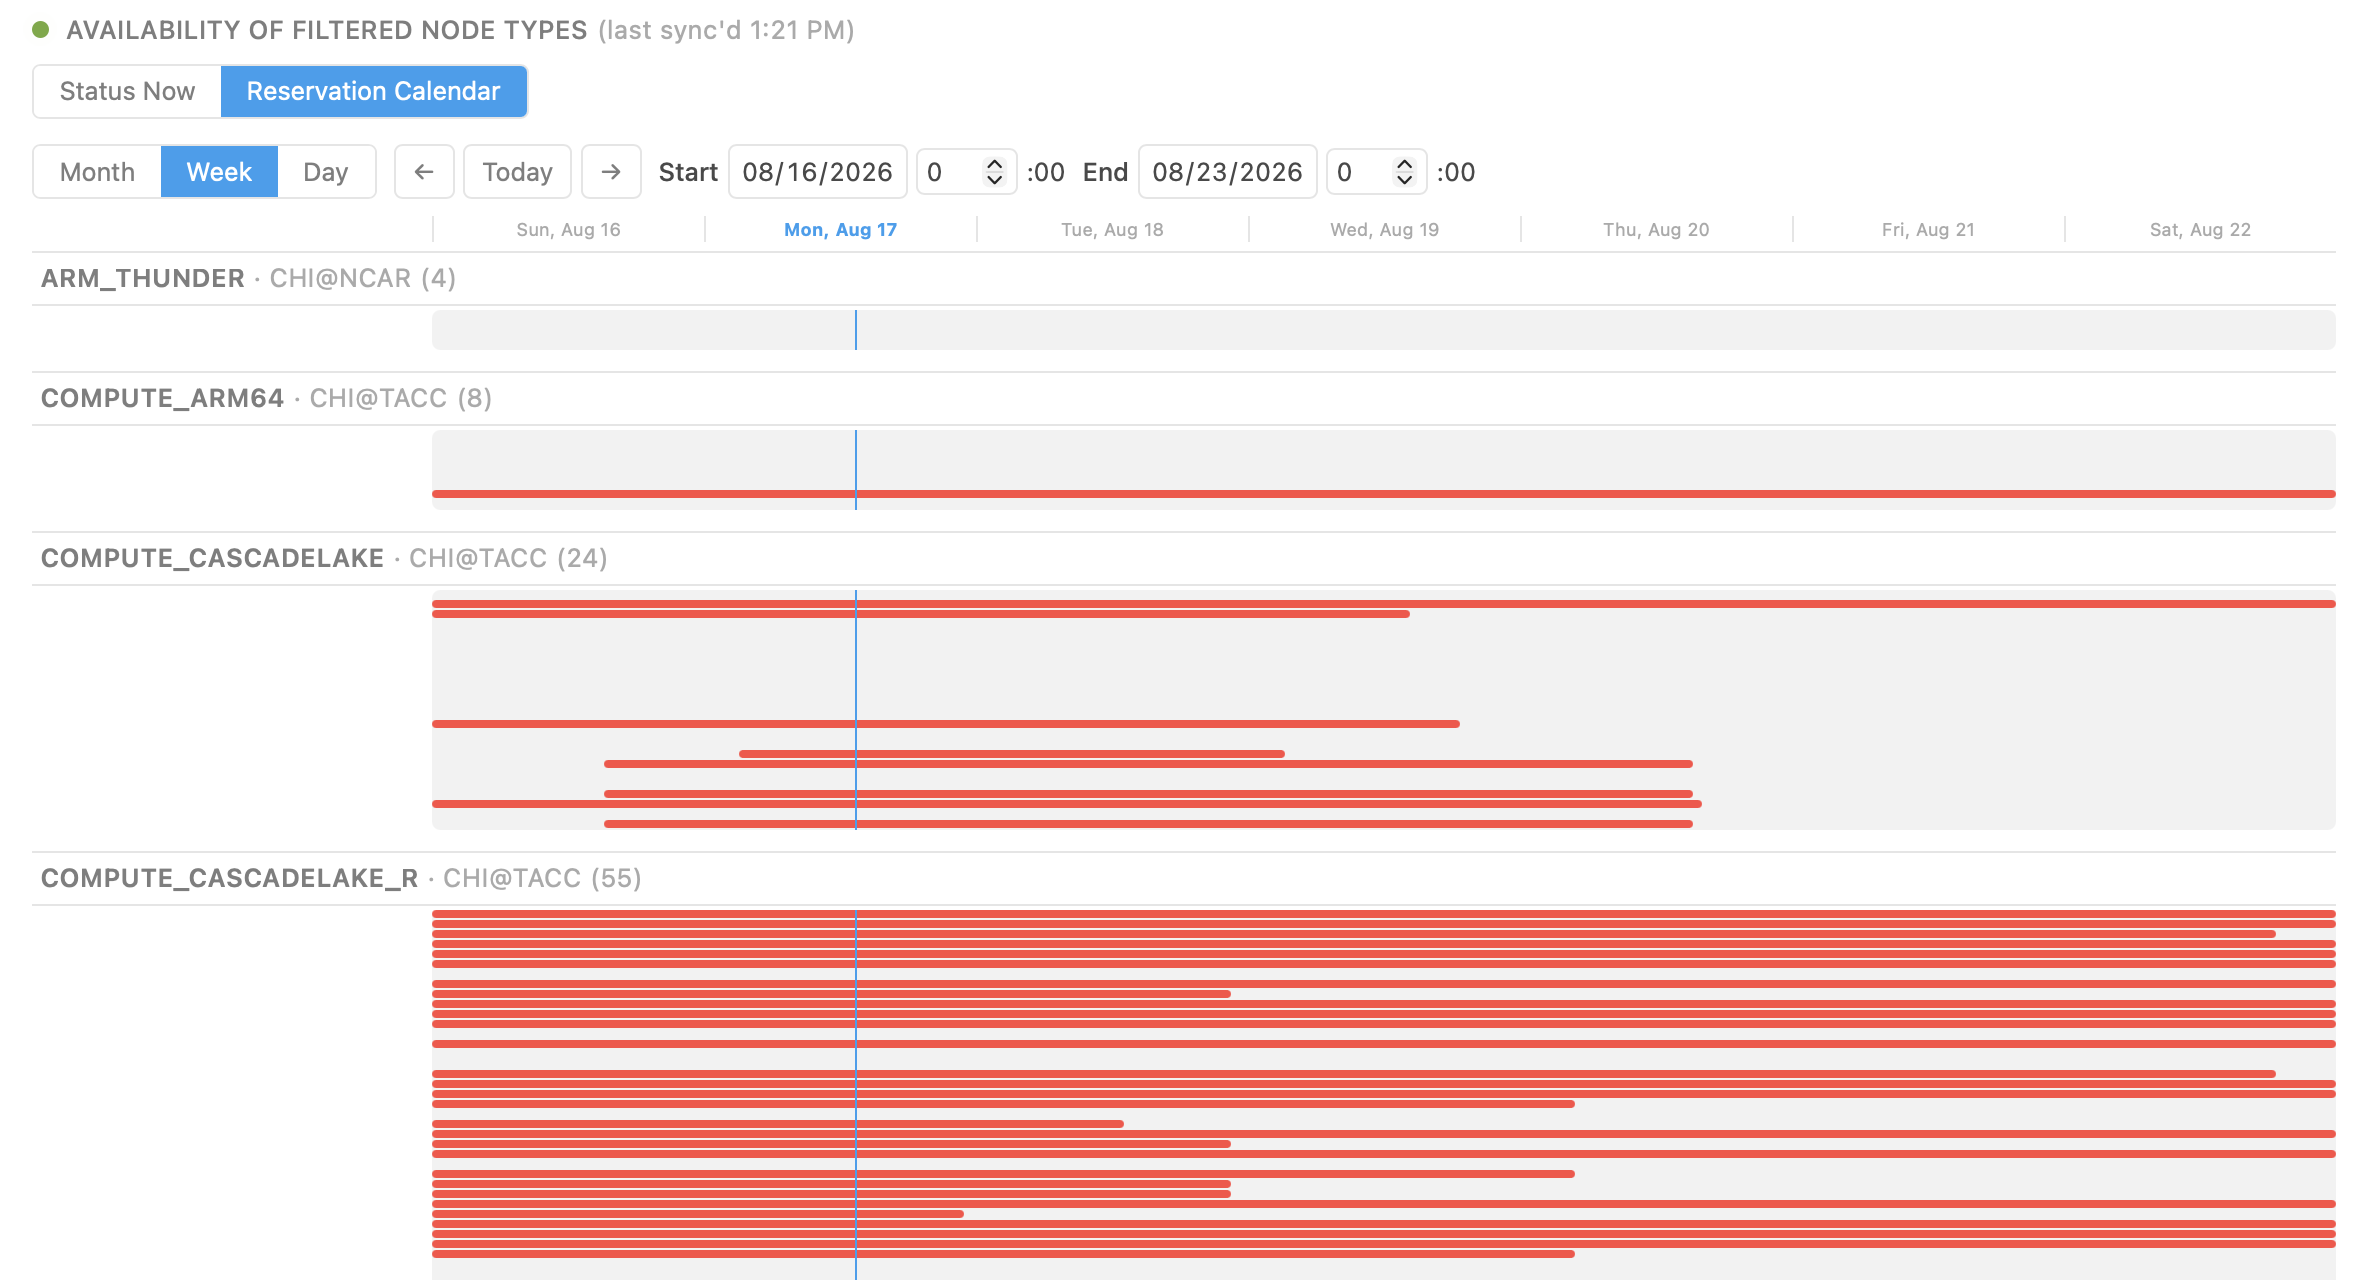
The same calendar collapsed to node type view, where overlapping bars make gaps in availability easy to spot.
Picking hardware and picking a time are part of the same decision, that is, how can I set up my experiment (what hardware can I use and when is it available?), and this is where you make it. The specs you need may be busy all week, in which case a nearby type with more free capacity gets your experiment running sooner. Or the type you want is free on Thursday but not today, so you plan the run for Thursday. Either way you learn it while you're still choosing, not after a lease request fails.
It also means no more swapping between two tabs, picking hardware in one and checking whether it's free in the other. Leave Resource Discovery knowing your node type, your site, and your window, then create the lease with whatever you already use, whether that's python-chi in a notebook, the OpenStack CLI, or Horizon.
Examples
Here are a few examples to dig a little deeper.
Sixteen homogeneous nodes. Set availability to the duration your run needs, switch the display to node types, and read the available count on each card. Any single count of sixteen or more means sixteen nodes of that node type, and the Reservation Calendar on the "by node type" view shows whether all 16 nodes will remain available for the entire duration of your experiment or not.
One node with a lot of memory. Switch the display to node types, so you're reading a handful of classes instead of every individual machine, then set the minimum RAM filter in the left panel to 512 GiB. Seven types come back. Most are GPU classes and many of those are reserved, but two others aren't: a storage class, and compute_nvdimm. If your dataset is a few hundred gigabytes, one nvdimm node can hold all of it in memory at once, so you can run an in-memory database or a whole-graph analysis on a single machine instead of sharding it across sixteen and paying for the network hops not to mention the complex configuration to set up a distributed database.
A small VM that stays up for months. Say you need somewhere to run a script that polls a data feed and uploads the results to an object store container for a whole semester. On the Virtual Machines tab, an m1.small at 1 vCPU and 2 GiB covers it, and setting the capacity chart to the next month shows the flavor has more than enough capacity.
Try It for Yourself
Start on the Resource Discovery page, and see the Resource Discovery documentation for full details.
Tell us what works, what you'd tweak, and what you want next on the Chameleon forums or using the Feedback link right on the resource discovery site. As always, if you run into any problems, please reach out via the Help Desk.
Happy resource browsing!